Transitioning to solar power is one of the smartest selections owners could make these days. With growing power fees and developing focus on renewable electricity benefits, solar panels have become a commonplace sight on rooftops. However, the setup process can appear complicated if you’re new to it. Understanding each step guarantees a clean and efficient setup whilst maximizing your long-term financial savings.
Table of Contents
When you work with a dependable Solar Installation Company in Virginia Beach, you’re not just purchasing panels—you’re investing in a system designed to generate clean energy for future years. Below, we’ll walk through the complete residential sun installation journey in a clean, step-by using-step manual.
1. Initial Consultation and Energy Assessment
The system starts with a detailed session. A sun expert will examine your electricity utilization, roof orientation, and available area. This evaluation helps decide the number of panels you want and the most efficient format for max sunlight exposure.
During this stage, your preferred solar setup organisation will even explain the kinds of panels to be had, device sizes, and approximate costs. They might also perform a shade evaluation to see if close-by trees or homes may affect overall performance.
2. Customized System Design
Once the evaluation is complete, a customized plan is advanced. This plan includes the precise range of panels, inverter kind, mounting device, and electrical connections. Design software program is often used to simulate energy output based on your region and roof orientation.
A nicely-organized design ensures that the setup runs smoothly and that the gadget is optimized for efficiency. At this level, your installer can also offer an estimate of potential financial savings and payback durations.
3. Permitting and Approvals
Before any bodily work starts offevolved, you’ll need permission from the neighborhood government. The allowing system guarantees that your solar setup meets constructing codes and safety guidelines. Working with a professional solar installation company in Maryland can simplify this step, as they often take care of paperwork and submissions on your behalf.
Some municipalities additionally require inspections of your house’s electrical system before setup. These steps may also take some weeks, so it’s crucial to devise a plan to avoid delays.
4. Ordering and Preparing Materials
Once let-ins are accepted, the necessary equipment—sun panels, inverters, mounting hardware, and wiring—is ordered. An official sun set up company in Maryland guarantees that the simplest, exquisite components are used, which guarantees performance and sturdiness.
In parallel, your roof is ready for setup. This might also encompass minor maintenance, structural reinforcement, or cleansing to create a safe operating environment. Proper practise allows save you destiny troubles and ensures panels are securely mounted.
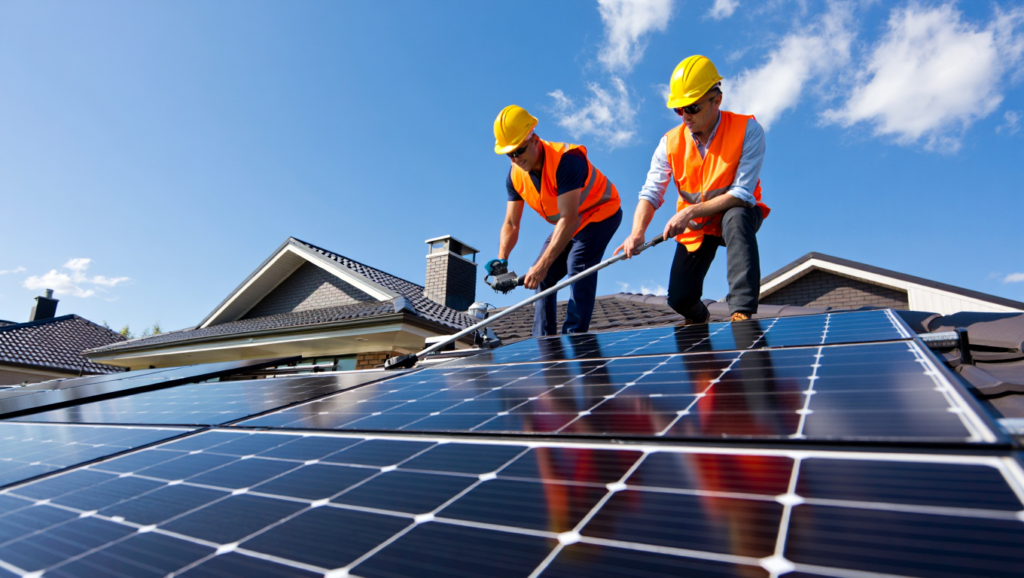
5. Installation of Panels and Electrical Work
With substances prepared, the installation crew begins mounting panels for your roof. The technique starts with putting in the racking device, which holds panels at the ideal attitude for sunlight exposure. Next, panels are cautiously secured, and electrical wiring is hooked up to inverters, which convert daylight into usable energy for your home.
A professional residential Residential Solar Panel Installer Virginia makes certain all connections are safe, code-compliant, and weatherproof. During this step, protection is a top priority, as installers work at heights and manage electrical components.
6. System Testing and Inspection
After installation, the device undergoes thorough checking. The team tests that panels are functioning properly, inverters are operating efficiently, and the output strength suits projections.
Finally, a nearby inspector may visit your private home to confirm that the setup meets safety and code requirements. Once permitted, your system is formally equipped to go live. This step guarantees peace of mind and lengthy-time period overall performance reliability.
7. Monitoring and Maintenance
Once your solar system is activated, ongoing tracking is vital. Many systems come with apps or online portals to synchronize power manufacturing in real time. Monitoring facilitates discovering problems early and ensures that your panels function at top efficiency.
Routine protection, like cleaning panels and checking connections, can be required. Most house owners find that proper care results in a lifespan of 25–30 years for their solar setup.
Final Thoughts
Installing solar panels at home is a rewarding process that calls for careful planning, professional installation, and ongoing maintenance. By knowledge each step—from session to activation—you can make informed selections and make sure a a hit sun journey.
An expert team makes the experience smoother, saves time, and ensures that your gadget is optimized for overall performance. With proper care, your solar investment can offer many years of easy, cost-effective power.
FAQs
1. How long does a standard residential solar installation take?
Most installations take between 1 and 3 days for physical setup. However, inclusive of session, layout, permitting, and inspections, the total procedure can take four to eight weeks.
2. Do I want to be domestic during the installation?
While it’s useful to be available for initial walkthroughs and very last inspections, homeowners don’t need to live with the complete installation. The expert crew handles all technical responsibilities.
3. How a whole lot protection do solar panels require?
Solar panels are commonly low-maintenance. Cleaning some times a year and checking for loose connections is sufficient. Most panels come with warranties lasting 20–25 years.
4. Can solar panels work on cloudy days?
Yes! Solar panels can nonetheless generate power on cloudy days, even though performance is barely decreased. Modern systems are designed to maximise energy seize in varying weather situations.
